Thursday, June 3, 2010

Custom Recipe Cards

Happy Thursday!!  So I may have mentioned that my sista is getting married this summer.  For her wedding shower we wanted to included a recipe card with the invitation.  The intent is for everyone to write out one of their favorite recipes and bring it with them to the shower to fill Sissypoo's (oh yes, sickening nicknames are not just for the Munchkin) recipe card box.  Well, you may (or may not) know that we are rather fussy in my family.  We don't necessarily want what everyone else has...or is commercially available...or has ever seen the light of day.  So, when little sister couldn't find a recipe card design that she liked, I offered to make them for her.  And you, dear readers, are the benefactor of my brilliance hahaha.  It's actually pretty darn simple.  A little digi-scrapbooking... a little Fed Ex Office...a little paper cutter...and you too can have your very own custom recipe cards.

I used Photoshop Elements because it's what I have.  You could certainly do this same thing with Microsoft paint - it would just take a little more patience. Here's the step by step:

Create a new blank file


And size it to 3.5 (w) x 5 inches (h)


Then just add in your elements.  I used a background that looks a bit like crumpled paper...a smiling pear as a fun accent (set to 38% opacity)...and all of the lines are one big block of text


Once our lovely recipear card was finished, I saved the file off as a .jpg.  Then I opened up a blank Microsoft word file and pulled in my little image four times, leaving a teensy little space in between them for the cut

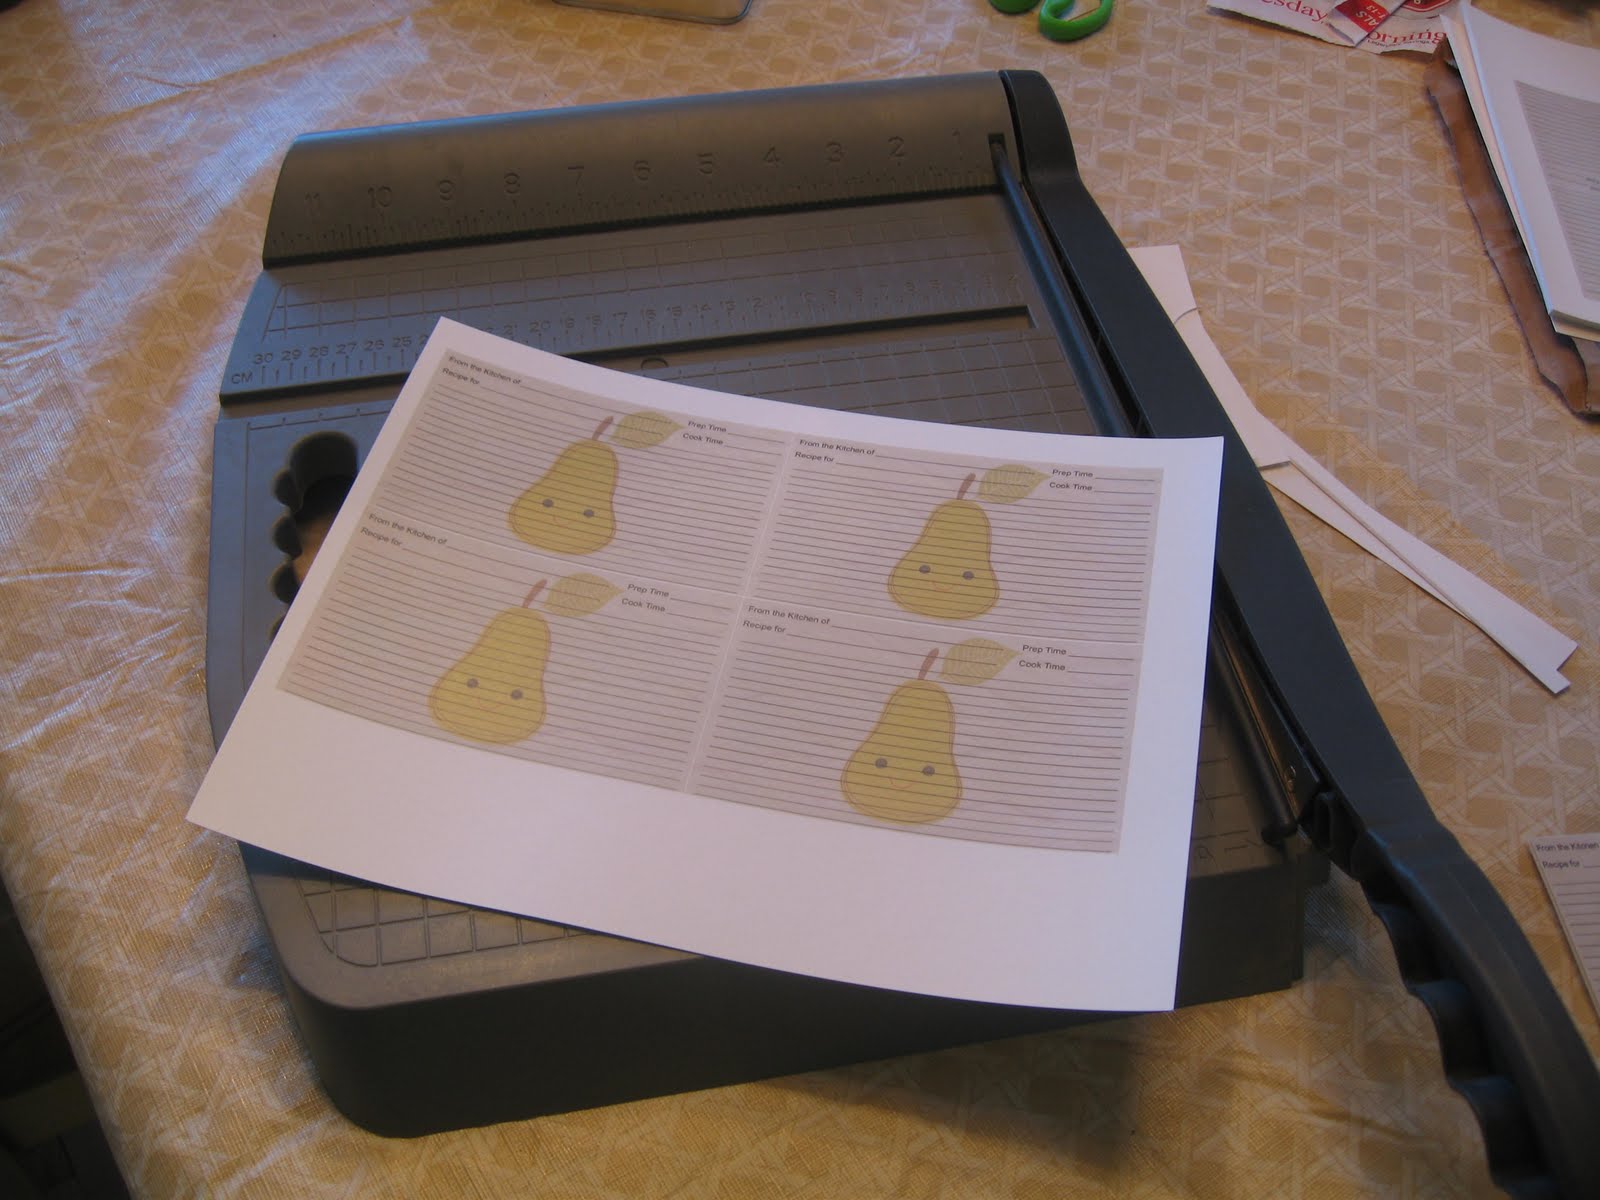
Then, I just sent the Word doc off to Fed Ex Office (formerly Kinko's) to print in color on 110 lb card stock.  They were ready in less than an hour :)  Once we got them home, it was just a matter of cutting all of the cards out with my trusty paper cutter


And in a 1/2 hour we had 80 happy recipe cards, all ready to include in the invitations


And in case you don't want to go to all of the effort of creating your own, here's another one of the designs all sized and ready to be printed (sorry, the pear one is a one of a kind for the bride) - Just click and save it

Wednesday, June 2, 2010

Gel Transfer is Awesome

Happy Wednesday!  So I finally got a picture of the gift I made for my in-law's 40th wedding anniversary:

(the in-laws are not aliens without faces, but they are kinda squeamish about being out on the internet)

I am so happy with how it turned out!  I started with an 8x10 canvas from Michael's that I painted a light blue (with Acrylic paint).


While that was drying, I opened up my Photoshop Elements and went to work creating a masterpiece nice photo layout.  (If anyone is interested in the how-to's of PSE, let me know and I can write up some tutes).  Once the picture was ready, I reversed the image (you'll see why in a minute) and printed it out on plain copy paper. 

And now for the magic... Paint on a nice even layer of Gel Transfer Medium and press the image into the Gel Medium (image side down).


A few things about the Gel Medium
I used Golden's and highly recommend it (although, take that with a grain of salt since I haven't actually tried any other kind).  And I used a cheap paint brush - I do not recommend that.  I had to pick little bristles out of the gel.  Next time I think I'll use a sponge roller.

A few things about the image transfer
After I pressed the image down, I smoothed...and smoothed...and smoothed...and squeezed out every possible little air bubble (because I really didn't want to have to start over). 

And now for the mess...  After the gel is good a dried (hours, even overnight) wet the paper down really well and rub all the paper off.  I used one of the Munckin's sippy cups to squirt the water on.


It took me three passes of water and sloughing to get all the paper residue off.  At this point it looked pretty, but I wanted a little more texture.  So off I went to Michael's (again) to buy some Crackle Medium.  I brushed/troweled on a thin layer.


Now, I must tell you...I had NO idea what I was doing.  I was thinking, "Oh I'll just put a nice layer of crackle medium on and it will spider like an old painting"  HA HA HA HA Not.  I decided to read a little online about the crackle medium...AFTER it was already drying on the almost done (but I just can't stop tinkering and the party is tomorrow) picture.  It dries OPAQUE.  So there I was at midnight, the night before the party...with the picture in the kitchen sink...frantically trying to wash off the crackle medium from the important parts of the picture...like their faces.  Luckily for me it worked.  The parts that I frantically scrubbed were free of opaque crackle medium and the parts that still had some looked pretty cool in a plaster-finish kind of way (if I do say so myself) - Crisis averted!  After that, I had used up any remaining desire to tinker with the picture, so I just added a little scrapbook heart embellishement and called it done. 


I absolutely love the image transfer process and I've already bought 3 more canvases! 

Tuesday, June 1, 2010

An Ocean of Fun

Happy Tuesday!!  Well this week's Munchkin Theme is a day late, but hopefully not a dollar short :)  The little Punkin has had such fun with our Fishing theme last week, that we're expanding it a little to include all the Ocean creatures for this week.  (And it's been crazy hot here, so anything that involves water play is VERY welcome!)  Here's our line up of deep sea activites:

Letter of the Week: O
Creative, Crafty, Sensory Fun:
  • O is for Octopus alphabet craft
  • Ocean creature water table play
  • Rainbow Fish collage
Books:
  • The Ocean by Susan Ring
  • Ocean by TickTock Books Ltd
  • Commotion in the Ocean by Giles Andreae
  • Smiley Shark by Ruth Galloway
  • Rainbow Fish Discovers the Deep Sea by Marcus Pfister Herbert
  • Clumsy Crab by Ruth Galloway
Songs:
  • Gertie the Goldfish
  • Fish Story
  • I'm a Little Fishie (sang to the tune of I'm a Little Teapot)

LinkWithin

Related Posts with Thumbnails