Showing posts with label Thrifty Craft Thursday. Show all posts

Thursday, July 22, 2010

Magnet Doll Up

Happy Thursday!!  A few weeks ago I scored few packages of Making Memories flower petals from Tuesday Morning for $1 a package. (Oh Tuesday Morning, how I love your little craft section!)  I knew they'd come in handy for embellishing something, I just didn't know what.  Then when I saw packages of clear round magnets at the dollar store (and maybe I bought something like 10 packages), I thought some pretty flower magnets would look lovely on my fridge.  And maybe they'll work to distract company from the dirty fingerprints..

This was the best kind of project - quick and instantly gratifying.  Here are my supplies:


Just take one clear magnet, hot glue three flower petals of varying sizes and finish it off with a small button. 


And now off to clean those darn fingerprints!

Thursday, July 15, 2010

Pretty Paper Decor

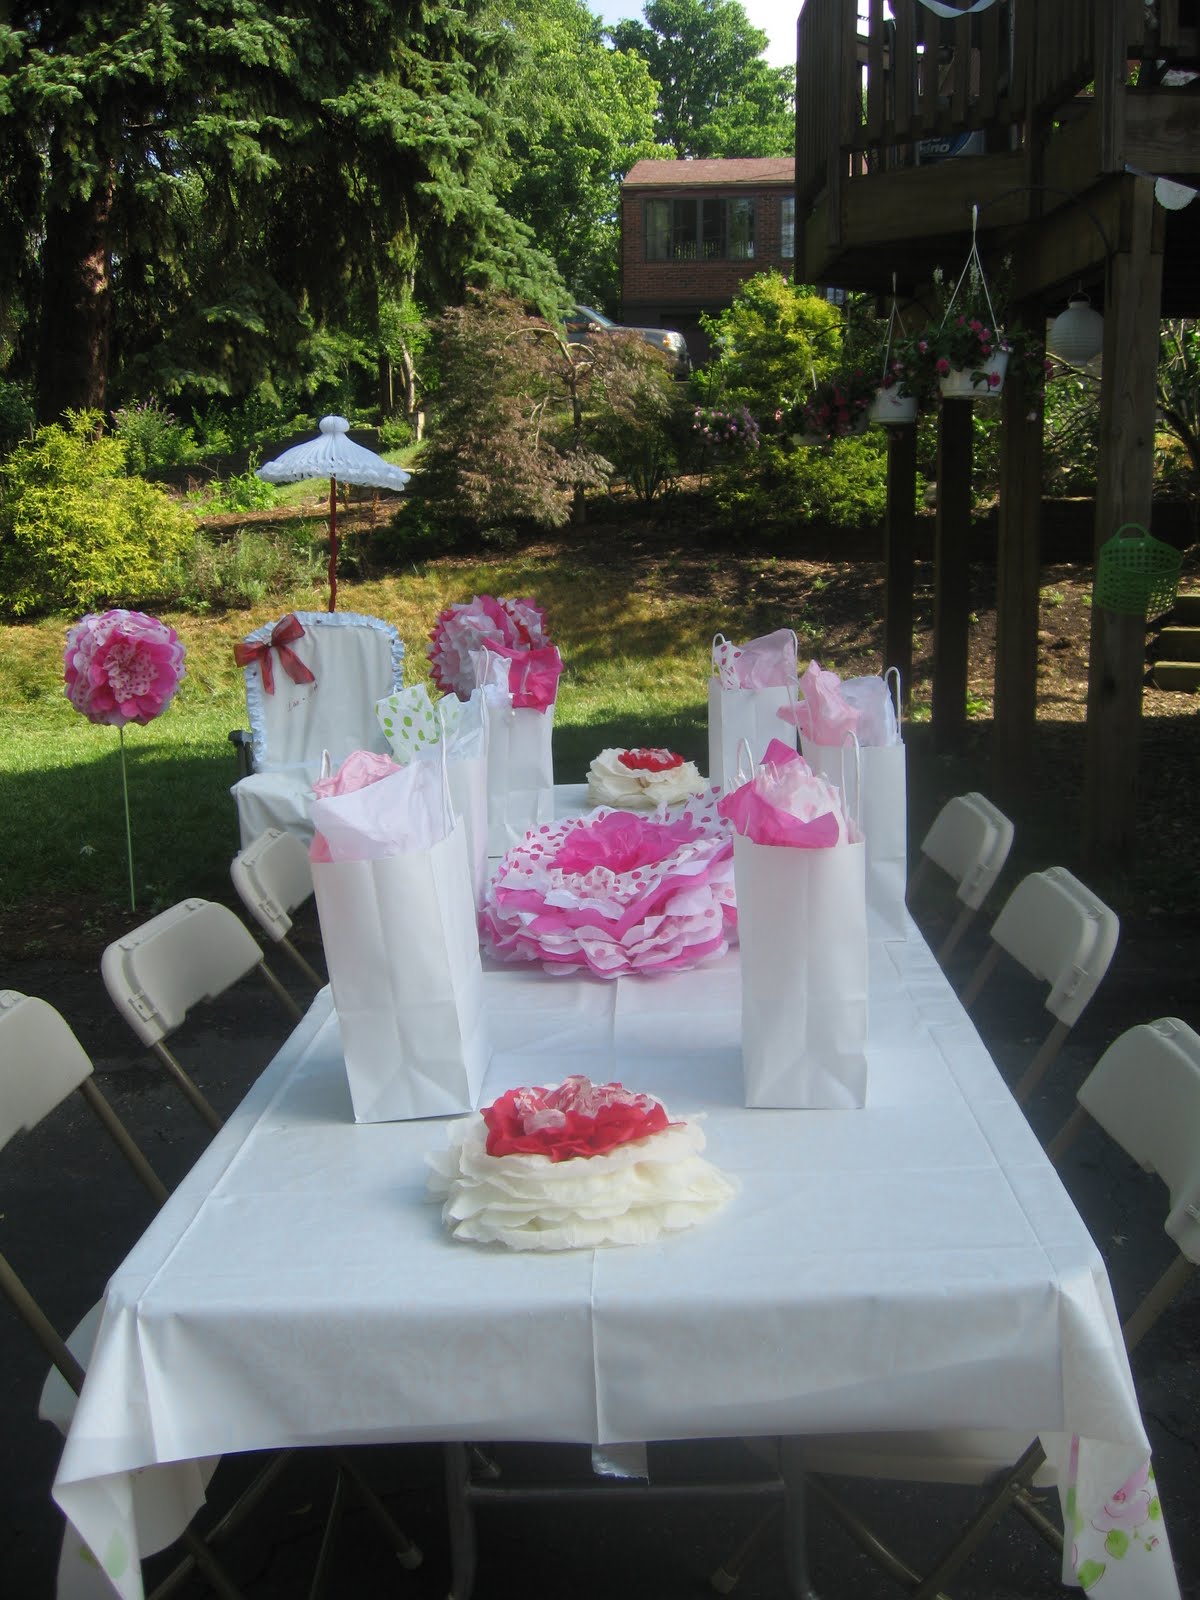
Happy Thursday!  This past weekend we hosted a bridal shower for my SIL at our house.  My in-law's family is on the small side, so it was an intimate party held outside under the shade of our ancient silver maple (well most of it was in the shade!)  This is the hubs only sister and my MIL went all out with a pink & girly theme.  There were dish rag bikini's, big tissue paper flowers (ala Miss Martha) and a completely decorated chair of honor.  My contribution to the decor (aside from cleaning like whirling dervish and impromptu landscaping), were some paper napkin flowers and these lovely paper doily garlands:


There are really only two three steps to the process:
1 - Fold all the doilies in half
2 - Use dots of hot glue to attach them to a length of ribbon
3 - Fold over each end  of the ribbon and hot glue down to provide additional stability for hanging.  This is a totally optional step, but I wanted to be able to hang the garland from my dining room hutch with another length of ribbon like so:

They are incredibly simple to make and I absolutely love how sweet and delicate they are :)


And here are a few more pictures (because I can't help myself!)

I used thumb tacks to hold them in place outside

Yes, he did attend the shower (he wanted to be 'out with the ladies')

Here's a table shot - aren't those tissue paper flowers gorgeous!

Thursday, July 1, 2010

Pretty Paper Flowers

Happy Thursday!!  Last week I blogged about this oh-so-lovely rainbow collage...


...and may have mentioned a little upcoming tutorial for the pretty paper flowers.  Well here is that little tute!  To make these pretty, fluffy, mini-flowers you will need a few VERY simple ingredients:
  • Few sheets of paper towels (and some newspaper or water-proof surface)
  • Watercolors (stolen borrowed from your son's stash)
  • Water
  • Small Round Object (ie: lid from a Diet Pepsi)
  • Thread
  • Seed Beads
On a little side-note, I love bullet lists.  They're so clean and organized, which is the polar opposite of my house... Okay then, we will now return to our regularly scheduled tute:

Step 1 - Spread out the sheets of paper towels (obviously white ones work the best) on your newspaper or other water-proof surface

Step 2 - Let loose and watercolor all over the paper towels.  I liked the hues that resulted from brushing colors on with a damp brush and then using a pastry brush (I gotta use what I got) to really saturate the towel with water.


Step 3 - Let em dry really well (I left them for a few days purely because I was busy with other things, but I'm thinking that a good 24 hours should do it)


Step 4 - Use your round object to trace circles onto the now lovely colored paper towels


Step 5 - Cut out all those little circles (I used 3 circles for each flower)

Step 6 - Seperate the layers of the paper towel


Step 7 - Stack up your flower circles (6 layers) and sew 3-5 seed beads to the middle of the flower (securing all the layers together)


Step 8 - Scrunch and scrunch and scrunch the little layers to fluff them up


Just like the collage itself, the flower assembly is a nice meditative task (which is a VERY welcome activity during naptime!)  They're a little time consuming (for being so tiny), but I think they're worth it :)

Thursday, June 24, 2010

Tea Towel Shower Cake

Happy Thursday!!  Today's craft is a tea towel cake that I made for my sister's shower.  My inspiration was this beautiful version from Aly & Ash.  I started with four coordinating tea towels and two cardboard boxes (one from crackers and the other from cereal)


I cut the front and back out of the cracker box and taped the edges together to form a round shape.  Then it was as simple as folding two of the towels around the shape and pinning in place


Once the bottom layer was folded and pinned, I placed it on a decorative plate and folded the third tea towel to fit in the bottom and add a bit of stability


For the second layer, I used the front and back of a cereal box, again taped to form a round shape.  And again, fold and pin the fourth tea towel around the shape.  To assemble, just put the second layer inside of the first layer, on top of the folded tea towel.  Then came the fun embellishment - I used a few whisks, spatula, wedding bell cookie cutter and some ribbon for decorations.  For the topper I used a mini colander and a pretty honey pot.  Here she is all ready to be wrapped up:


I think this might be my new go-to shower gift.  It packages up so pretty and it can be customized to the bride's taste or kitchen colors. 

Thursday, June 3, 2010

Custom Recipe Cards

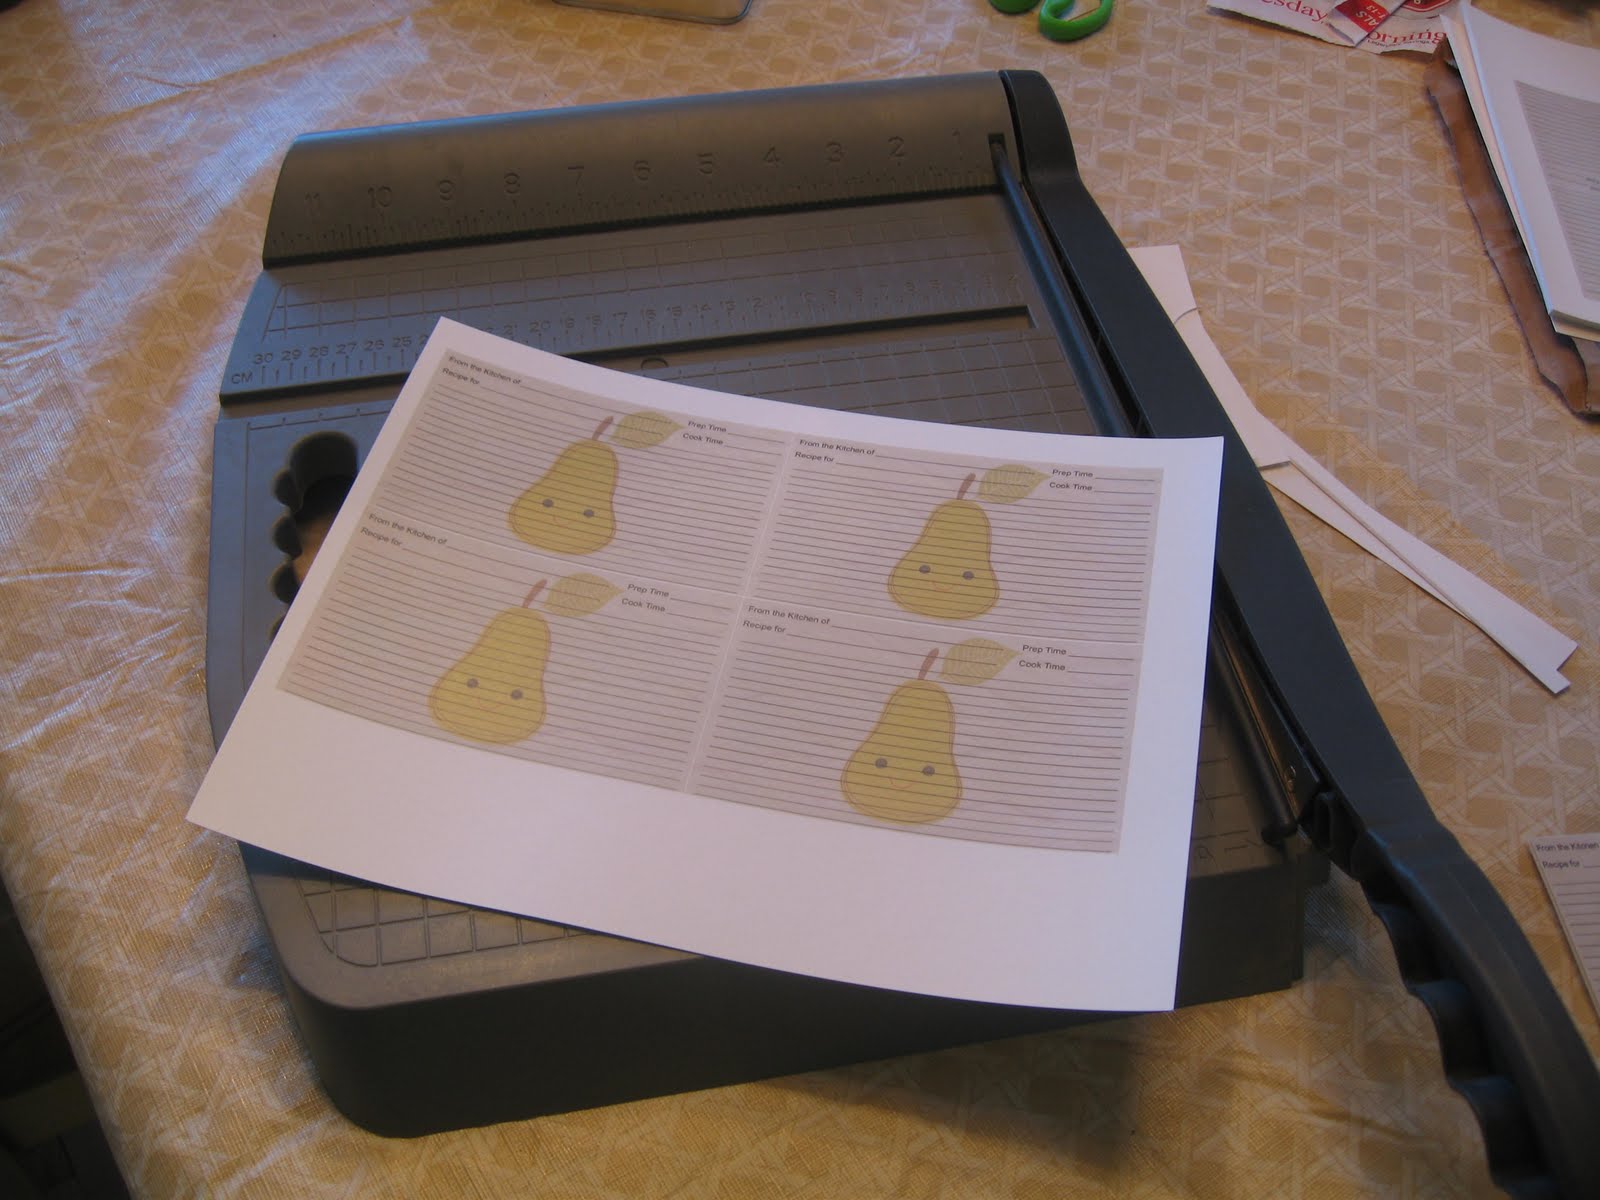
Happy Thursday!!  So I may have mentioned that my sista is getting married this summer.  For her wedding shower we wanted to included a recipe card with the invitation.  The intent is for everyone to write out one of their favorite recipes and bring it with them to the shower to fill Sissypoo's (oh yes, sickening nicknames are not just for the Munchkin) recipe card box.  Well, you may (or may not) know that we are rather fussy in my family.  We don't necessarily want what everyone else has...or is commercially available...or has ever seen the light of day.  So, when little sister couldn't find a recipe card design that she liked, I offered to make them for her.  And you, dear readers, are the benefactor of my brilliance hahaha.  It's actually pretty darn simple.  A little digi-scrapbooking... a little Fed Ex Office...a little paper cutter...and you too can have your very own custom recipe cards.

I used Photoshop Elements because it's what I have.  You could certainly do this same thing with Microsoft paint - it would just take a little more patience. Here's the step by step:

Create a new blank file


And size it to 3.5 (w) x 5 inches (h)


Then just add in your elements.  I used a background that looks a bit like crumpled paper...a smiling pear as a fun accent (set to 38% opacity)...and all of the lines are one big block of text


Once our lovely recipear card was finished, I saved the file off as a .jpg.  Then I opened up a blank Microsoft word file and pulled in my little image four times, leaving a teensy little space in between them for the cut


Then, I just sent the Word doc off to Fed Ex Office (formerly Kinko's) to print in color on 110 lb card stock.  They were ready in less than an hour :)  Once we got them home, it was just a matter of cutting all of the cards out with my trusty paper cutter


And in a 1/2 hour we had 80 happy recipe cards, all ready to include in the invitations


And in case you don't want to go to all of the effort of creating your own, here's another one of the designs all sized and ready to be printed (sorry, the pear one is a one of a kind for the bride) - Just click and save it

Thursday, May 20, 2010

Framed Butterfly

Happy Thursday!!  Today's thrifty craft is a take-off of this gorgeous pillow that Disney over at ~Ruffles And Stuff~.  I had a little Dollar Store frame that was in need of something (sorry, I can't seem to find a before picture of the frame - it was just basic wood toned).  So I sprayed my little Dollar Store frame with a few coats of Heirloom White (ah spray paint, how I love you) and put it in my stash for a rainy day.  Well let me tell you, the past few days have been rainy.  So out came my little cream-alicious frame and with Disney's generous pattern, I cut a butterfly out of light blue felt and another one out of a scrap of pastel cotton and sewed them together (I ran a stitch around the edge and around the body of the butterfly):

(my appologies for the bad photo - it was dark and rainy)

And now for the assembly.  I took a page from an old book (used for such projects) and cut it to fit in the frame.  Then just a little dab of hot glue just on the butterfly body to attach it to the book page and viola:

It adds such a fun touch of whimsy to our end table :)

Thursday, May 13, 2010

Shabby Chic Initial

Helloooooo Thursday!  Wow, where has this week gone?  For this week's thrift craft, I give to you...a giant moss covered C.  Still reading?  Ok, so it is a big moss covered C, but its all shabby chic like and purdy.  A little more interested?  Ok then, read on fellow shabolicious reader :)

This story starts with a scrap piece of 1x10x7 and some oopsy paints from Lowes (thank you shopper who's paint was screwed up)  I took the scrap piece of wood and painted it with two coats of a lovely red paint and then another two (very light) coats of a light grey-beige paint

Sorry, I forgot to snap a picture of the red coats - here she is with the grey-beige paint on top

Once she was all dry (actually, a few days) I took a piece of 180 grit sandpaper and went to town.  I sanded down to the wood in a few places, but the goal was to just weather it and let some of that red paint show through, like so...


I bought a pretty big letter C a few weeks back at JoAnn's and was just waiting for inspiration to strike.  Enter a little moss, a little hot glue...


And wham, bam hot glue gun Sam...I ended up with a happy shabby chic initial for my bookcases


I especially love it paired with the delicate look of the butterfly boxes.  I'm sure the display on these bookcases is going to be ever-evolving, but I'm still trying to fill them up with things that I love right now.

Thursday, May 6, 2010

Summer Decor Balls

Happy Thursday!  Has anyone seen this awesome closeline at the Dollar Store?  It was tucked away with the weird car/garage stuff at my store, but I sniffed it out. 


Ok, maybe sniff is not the right word...  It reminded me so much of that lovely bakers twine from Divine Twine.  So I bought up a bunch of it in all of these delicious colors and set to work hot gluing said clotheline to styrofoam balls. 


I love the end result - they're oh so fresh and summery.  The blue ones in particular feel very naughty nautical.


And if anyone is wondering (I'm sure all of you are on pins and needled...ha!) I'm totally procrastinating on my Mother's Day gifts.  I'm a bad, bad little monkey! 

Thursday, April 29, 2010

Pretty Lil Magnet

Happy Thursday!  A few weeks ago, I picked up a few of these magnets at JoAnn's for $.50 a piece.  I think that they're cute as is, but I like to burlap the lily (hey, you say gild, I say burlap).  And yes, I bought a few.  Yes, I have a craft-supply shopping addiction. 

Here's the magnet hanging out with all the little scrap fabric that I'm going to use for the embellishment

I happened upon this magnet again yesterday and thought, 'hmm, I have a lovely tin planter just waiting for a sweet magnet like this'  Yep, I have wacky conversations in my head.  So I rounded up some scrap fabric, tied a little rag embellishment and hot glued said embellishment to aforementioned magnet.  Done and done.  Oh right, first slap magnet onto tin planter and then done.


It's a little cutesy, but I like it :)  And not bad for 50 cents (hmm, whatever happened to 50 cent?  Can I still find him in the club?)

Thursday, April 22, 2010

106 More Days...

...till my sister gets married!!  Her shower is coming up in a few months, but I just couldn't wait to give her a little something.  When I was waiting for my wedding day, I loved having a countdown calendar.  Since a 100+ day countdown calendar seemed like it would be a little, um, huge.  So I turned to my oh-so-awesome can of chalkboard paint :)

I picked up a small wooden plaque and sprayed it with 4 coats of chalkboard paint


Then I rounded up (ok, I mostly went out and bought) some pretty, sparkly ribbon in shades of white, silver and cream


I created a strip of rag garland using all that sparkly ribbon and some strips of white and cream cotton fabric to give it tons of fluffiness.  To assemble, I just used my staple gun to adhere the rag garland handle to the back and viola...wedding countdown chalkboard:


I liked this lil hanging chalkboard so much that I've got a few more in the works...and I'm offering one of them up for my first eva giveaway!  On Saturday, I'm going to use my nifty random generator to pull one of my (amazingly awesome!) followers. 

Thursday, April 15, 2010

This Little Piggy...

...got covered in Chalkboard paint and is so cute :)  I've been seeing alot of numbered items out there.  I love things with numbers on them.  I love things with letters on them.  I even love fonts (really, is it weird to love fonts?)  Here's my slightly whimsical take on numbered cuties:


I picked up 3 little piggy banks from the Dollar Store - here's what they looked like before


Then I just coated them in a few layers of plain old black paint and then another two thin layers of chalkboard paint (I really love the super matte look of chalkboard paint!) 


The numbers are written stenciled in chalk.  I thought I'd go with something a little prettier than my own handwriting.  Since a Cricut is still on my wish list, I just printed out the numbers onto plain paper.  Then I cut them out (with scissors no less) and used the stencil to chalk on the numbers.  I am loving these 3 little pigs!  Now I just have to find a home for them in the my little Piglet's room :)

Thursday, April 8, 2010

Presto Chango Burlap Pillow

Oh how I love the burlap pillows that are popping up everywhere!  With so many lovelies out there, it was hard for me decide what I wanted to try first (and I only had time for one this week).  I would really like a bunch of spring/summer pillows to liven up the beige-ness of our furniture, but I didn't want to have a bunch of pillow covers that I'd have to store after the summer (I already have way to much stuff in my attic!)  Sooooo, I made a lovely lined burlap pillow cover and decided to use pin-on embellishments for each season (or whenever the mood strikes).  I only made one so far, but I love it!  This weekend I'll sew up a few more in different sizes.  Then I can sew one or two really spring/summer pillows to add into the mix :)

I started with a little travel pillow (I have found them to be much cheaper than actual pillow forms of comparable size), and sewed a simple envelope cover.  Because the burlap is loosely woven, I decided to sew in a lining too:


Left plain it looks just like a feed sack.  Actually, I do kinda like it plain, but the rest of my living room is too formal to pull it off. 

For a little pop of spring, I sewed a little rustic flower from a few scraps of fabric (oh how I love scraps of fabric).  I used a strip approximately 3' long and 2" wide to gather into a ruffly circle using a running stitch (sorry, I didn't think to take a picture of this step).  And for the center I just took another strip approximately 2' long and 2" wide and wound it around into a coil:


Once the flower center was big enough, I hot glued it to a little round of felt - super easy!  Then I hot glued the center right onto my ruffly flower:


I stitched a safety pin to the felt and attached the finished flower to the pillow.  Here's my new Presto Chango pillow:


I love the simple embellishment right now...but who knows, tomorrow I might make a few more little flowers or something altogether different :)

Thursday, March 25, 2010

Ballard Typewriter Key Inspiration for Cheapity Cheap Cheap Cheap

Yay it's Thursday :)  I'm finally getting around to making my own Ballard-Inspired Typewriter Keys.  I saw these in the catalog in, eh, December or so and made a little note to copy use them as inspiration. 

I've seen some other, inspired, versions out there and I decided that it was high time to create my own.  Now my challenges are - I need much smaller circles for the space I have in mind and my budget is considerably smaller than the $300 these babies would cost me (who pays that!?!)  Enter these from Walmart:


These little guys have about a 1 1/2 inch radius (wow, who knew I remembered geometry!) so each one is roughly 3 inches across.  And although they have the lovely basketball design (which is raised), the backs of them are a clean slate!  Oh yeah, and the BEST part...they were 25 cents apiece.  They set me back a cool $1.50.  And now for the letters (thank you JoAnn's) for $4.50 (anyone else think this is a little pricey for little wooden letters??). 

I painted the backside of the basketballs with black spray paint (gloss finish), nd then I painted the letters with cream spray paint (satin finish):


Now, it looks fine like this, but I was looking for a little more pizzaz...modge podge here I come!  I took some scraps of scrapbook paper from my stash (does the word stash make anyone else think of moustaches?  No?  Ok, must just be me) and did the old trace once, modge podge twice routine...waited for them to dry...hot-glued them to the disks...aaaaand we're done:


I'm thinking of mounting them to a nice piece of distressed wood or maybe a little beadboard...but until then I love 'em as is :)

So let's do a final cost breakdown shall we:
  • Round (previously basketball) discs from Walmart: $1.50
  • Letters from JoAnn's: $4.50  (I really need to find a cheaper source)
  • Paint from Walmart (because I was out of black spray paint): $3.50
  • Scrapbook Paper: $0 (on hand)
Grand Total: $9.50  Saving $290...PRICELESS!


http://www.thethriftyhome.com

Keeping It Simple

The Girl Creative
Making

LinkWithin

Related Posts with Thumbnails