I started out with a nice, roomy bag from Target ($1)

And ended up with a cute, ruffle-y bag that I can't wait to take shopping!
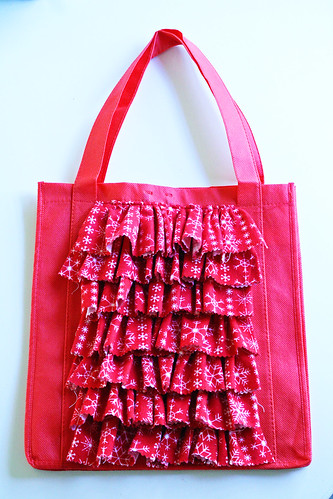
Because the Target logo was so big, I needed to embellish the whole side panel. I decided on ruffles for both the cute/girly factor and the speed to market (heh heh). After I had the size and spacing of the ruffles figured out, it only took me about 30 minutes to ruffle both sides of the bag.
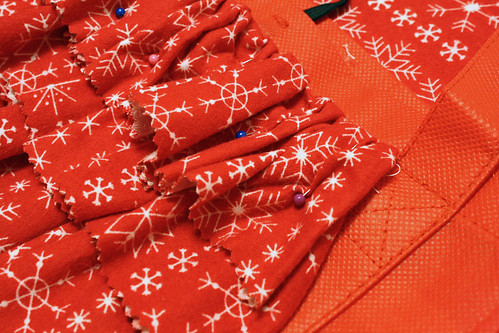
The ruffles are made from snuggle flannel cut with pinking shears. The pinking will help reduce the amount of fraying (not that snuggle flannel frays much to begin with) but, since the purpose of the bag is shopping, I expect them to take some abuse.
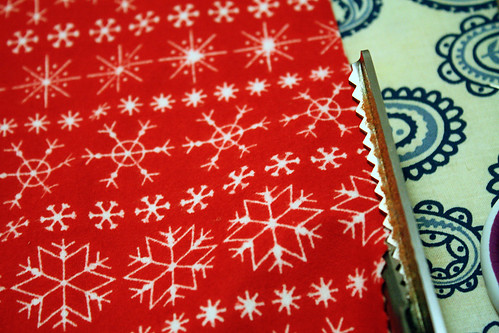
For this particular panel size (7 inches across), I found that a length of 21 inches worked great for a single ruffle. That ratio is also my standard rule of thumb for ruffles - I start with a length that is 3 times the desired finished length. In this instance, it was also convenient that 1/2 of my fabric width was 21 inches.
After a little experimentation, I settled on a ruffle width of 3 inches.
To ruffle each strip, I simply run it through my sewing machine, smooshing it into gathers as I go - but use whatever ruffling method you prefer.
To attach the ruffles to the bag, start with the bottom ruffle and work upwards.
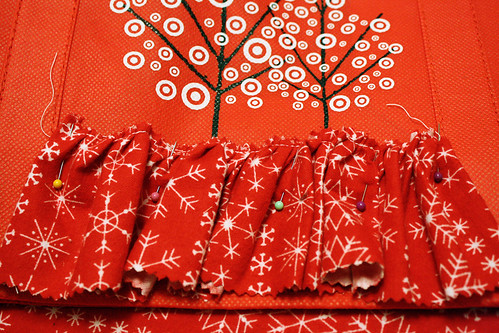
Pin the ruffle onto the bag and top stitch. I found that it took constant vigilance to make sure that no other part of the bag found itself under the needle.
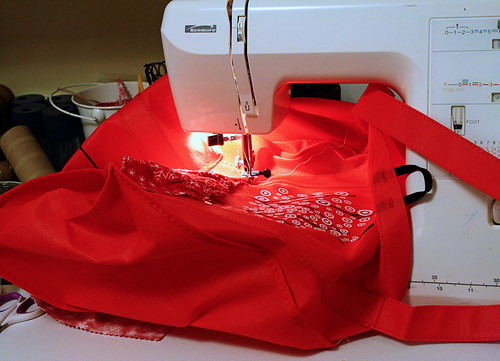
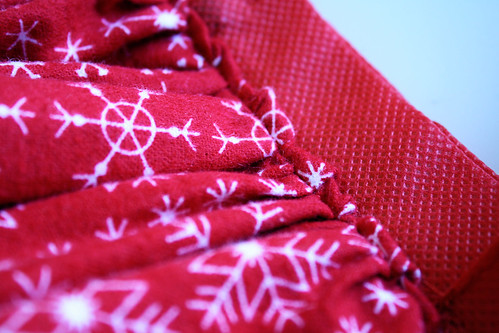
Once you get to the top ruffle, you'll want to finish it off with a clean edge. To do that, start by sewing the top ruffle on upside down, right sides together

Once stitched, flip the ruffle over and pin in place
Then top stitch 1/4 from the top. I tried to keep the edge flush with the existing seam of the bag
And here it is just waiting for it's first shopping trip :)

I think this would make a such a great gift bag too!
I participate in the following link parties: Sumo's Sweet Stuff, Skip to My Lou, The Girl Creative, Making the World Cuter, Miss Crafty Pants, Super Stinky Boys, Mad In Crafts, Embellishing Life Everyday, Keeping It Simple, The DIY Home Sweet Home Project, Chocolate Drool & Kisses, Simply Cadence, Polly Wanna Crafter, Sew Can Do, Tip Junkie, My Frugal Family, Coastal Charm, New Nostagalia, Blessed with Grace, The Creative Itch, Funky Polka Dot Giraffe, Home Stories A to Z, The Lettered Cottage, A Bowl Full of Lemons, At Home with K, All Thingz Related, Today's Creative Blog, Not Just a Housewife, Sew Much Ado, Blue Cricket Design, My Backyard Eden, Gluesticks, Extreme Personal Measures, The Thrifty Home, The Trendy Treehouse, Someday Crafts, All Things Heart and Home, Elements Interiors, My Girlish Whims, DIY by Design, Somewhat Simple, House of Hepworths, Seven Thirty Three, Fireflies and Jellybeans, Beyond the Picket Fence, Black Kat Design, Thrifty 101, Fingerprints on the Fridge, Finding Fabulous, Poppies at Play, The Inspired Room, KoJo Designs, Whipperberry, Inspiring Creations, Romantic Home, The Speckled Dog, At the Picket Fence, Little Brick Ranch, Designer Garden, Simply Sweet Home, Simply Designing, Tatertots & Jello, Funky Junk Interiors, Be Different Act Normal, Saturday Morning Blog, It's a Crafty Life, I Heart Naptime, Under the Table and Dreaming, Creative Jewish Mom, Flamingo Toes, The DIY Showoff, Marvelously Messy, Nifty Thrifty Things, Thrifty Decor Chick, The Cottage Chick, Running with Glitter, One Artsy Mama, Dittle Dattle, Southern Lovely,
8 comments:
Isn't Everything better with ruffles? This is too cute! Thanks for sharing it with us :) (and good luck on black Friday!!)
Ruffles are my fav! They really dressed up the bag:)
This is such a good idea!! I love ruffles!! It turned out so cute!
Nice!! What a great look the ruffles gave it! New follower here. Would love it you would stop by and share this at my linky party :) http://everything-underthemoon.blogspot.com/2011/11/bedazzle-me-monday-8.html
Also, PRETTY PLEASE check out Random Acts of Kindness Week going on right now!! Would love to see you be a part of it! http://everything-underthemoon.blogspot.com/2011/11/kindness-and-thanksgiving.html
that's pretty awesome! I hate the logo on my safeway reusable bags! i never even thought to cover it! thanks for sharing!
I love ruffles -- what a great makeover for your shopping bag!
That is so cute and would make great Christmas gifts!
very clever and cute makeover!
Post a Comment